✨ The Ultimate Beginner-Friendly Charcuterie Board for Effortless Party Appetizers ✨
1. Introduction
Hosting a gathering doesn’t require five-star culinary skills—especially when you know how to assemble a beginner charcuterie board that delivers big on flavor, variety, and visual flair. This easy party appetizer is all about simplicity, elegance, and spontaneity. Think of it as edible art: an intentional combo of meats, cheeses, fruits, nuts, and crackers, artfully arranged on a single large platter or wooden board. Whether it’s for a low-key hangout, a birthday toast, or a last-minute game-day snack, this no-fuss charcuterie platter always impresses—and best of all, it takes barely any prep time. As someone who’s gone from “What *is* a charcuterie board?” to confidently assembling three of these in one afternoon (yes, really), I’m here to guide you through a foolproof method that feels indulgent but requires zero stress.
2. Why You’ll Love This Recipe
- Ready in under 20 minutes—no cooking required!
- Friendly for all diets: Easily adaptable for vegetarian, gluten-free, or dairy-free guests
- Customizable to your budget: Scale up or down depending on how many guests you’ll have
- Zero clean-up stress: Everything’s served cold or room temp—no active stove time
- Loads of personality: Endless combinations mean your board can reflect your mood, season, or favorite flavor pairings
3. Ingredient Notes
Great charcuterie doesn’t come from randomness—it comes from thoughtful combinations. Here’s how to pick ingredients that *actually* work together:
- Cheeses (2–3 types): Aim for a mix of textures. For beginners, go with a soft brie (creamy & approachable), a semi-hard cheese like aged gouda or manchego (nutty & sliceable), and a blue or sharp cheddar if you want a bold punch. Pre-sliced or pre-crumbled cheeses save time—but buy small wedges and let them sit at room temperature for 15 minutes before serving. Cold cheese tastes muted; warm cheese sings.
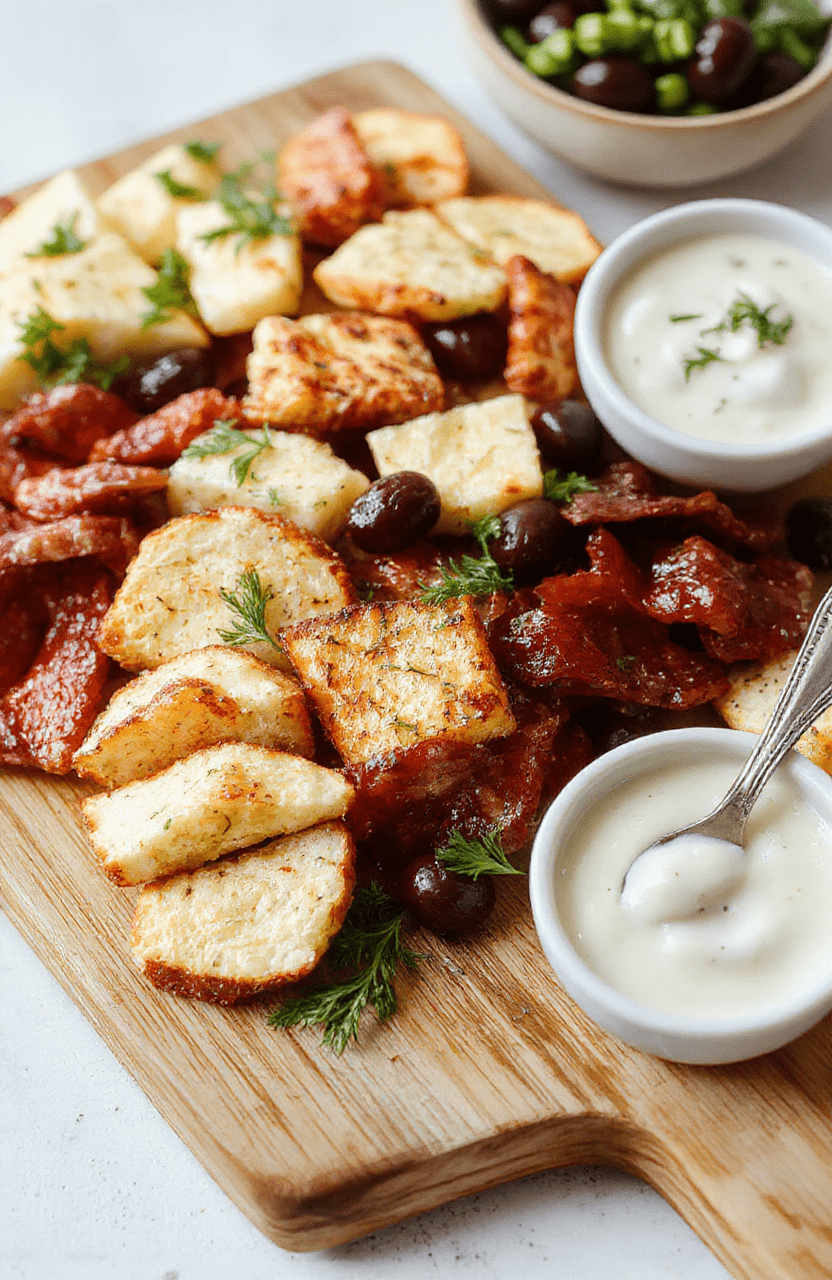
- Meats (2 types): Cured meats add savory depth. Choose one delicate (like prosciutto—thinly sliced and fragile) and one heartier (like salami or pepperoni). Fold or roll them artfully instead of piling them neatly—texture is part of the charm.
- Fruits (fresh & dried): Grapes (try mixing green and red), sliced pears or apples, figs (fresh or jammed), and dried apricots or dates add sweetness and contrast. Fresh fruit should be room temp and dry (pat with paper towel); wet fruit sogs the board.
- Crackers & Breads: Offer variety in shape, size, and texture—water crackers, seeded bread crisps, toasted baguette slices, and even pretzel sticks for crunch. Always keep a gluten-free option on hand if you’re unsure of dietary needs.
- Accoutrement Extras (1–2 max): A small bowl of honey, sharpDijon mustard, or fig jam adds a glossy, sticky glaze of flavor that ties the board together. Nuts (like toasted almonds or pistachios) offer a satisfying crunch and protein boost.
4. Kitchen Tools You Need
You *can* build a stunning board with what you already own—but a few smart tools will make the process faster, cleaner, and more repeatable:
- A large carving board, slate tile, or even arimid glass tray for presentation (the bigger, the more room to move items around without crowding).
- Deluxe 33-Piece Silicone Utensil Set: Handy for scooping jam, arranging cheese, and serving without cross-contamination—each tool is color-coded and dishwasher-safe.
- Fullstar Ultimate Veggie Prep Master: If you want to add fresh fruit or veggie garnishes (like cucumber rounds or radish roses), this multi-blade prep tool makes slicing quick and uniform.
- EUHOMY Portable Rapid Ice Maker: chilled plates and chilled serving utensils keep everything refreshingly cool (especially handy in warmer months).
- JoyJolt Airtight Glass Food Storage Set: Ideal for prepping the day before—store cut fruit, nuts, or dips in these leakproof containers, so assembly is just rearranging the puzzle.
5. How to Make Your Beginner-Friendly Charcuterie Board
Phase 1: Prep & Planning (10 minutes)
Start by laying out your board on a flat, stable surface. Remove cheeses and meats from the fridge 15–20 minutes ahead of time.Slice hard cheeses into thin wedges or parallelograms. Fold soft cheeses in quarters or roll into small discs—don’t slice brie all the way through!
Next, prep your extras: pit and halve dates, wash and dry grapes thoroughly, pre-slice apples and pears (thinly!) to prevent browning—dip in a little lemon water if you’re making them more than 30 minutes ahead.
Phase 2: Anchor & Arrange (5–7 minutes)
Now the real fun begins. Don’t arrange everything in neat rows—that screams “store-bought.” Instead:
- Place your smallest items first—small bowls of mustard or honey, small dishes of nuts, or mini jars of olives. These act as anchors or “spacers” to break up the board visually.
- Add cheese pieces next, spacing them around the board like puzzle pieces.
- Arrange meats in small piles or folds near the cheeses they complement. Fold prosciutto into rosettes or lay in delicate fans.
- Tuck in fruits and crackers around the cheeses and meats, filling gaps without overcrowding.
- Finish with final accents: drizzle a little honey over the brie, scatter chopped herbs, or place a sprig of rosemary on the side.
Visual cue check: Your board should feel full but not cramped. You should be able to see at least 25% of the board surface just below the food—this gives the eye room to rest and makes the dish look intentional, not cluttered.
Phase 3: Add Tools & Instructions (2 minutes)
Don’t forget serving utensils! Tongs, small spreaders, and separate knives for each cheese/meat make the experience less intimidating—especially for guests trying charcuterie for the first time. Tuck in a tiny chalkboard or card that says “Pair & Enjoy: Try prosciutto + fig + brie!” This simple cue transforms a great board into a memorable experience.
6. Expert Tips for Success
From trial-and-error (and yes, a few “what *was* I thinking?!” attempts), here’s what I’ve learned:
- Odd numbers look more natural. Cluster items in groups of 3 or 5—not 4 or 6.
- Color balance matters. Red grapes, green apples, and golden honey create visual harmony.
- Leave breathing room. Don’t pack foods tightly—leaving space between elements allows guests to easily pick and choose.
- Go beyond the basics. Add something unexpected: pickled onions, marinated artichoke hearts, or even a small scoop of potato salad for a nostalgic twist.
- Keep it chilled (but not icy). Place the board on a slightly chilled slate or a bed of ice in a large tray to extend freshness for outdoor or warm-weather events.
7. Variations & Substitutions
Charcuterie is incredibly versatile. Here’s how to adapt it to your needs:
- Vegan option: Swap cheeses for cashew-based “brie,” smoked tofu “bacon,” marinated tempeh strips, and a mix of roasted nuts and olives. Use gluten-free crackers and include vegan jam.
- Gluten-free: Skip bread-based items. Offer rice crackers, gluten-free seeded crisps, apple slices, or pear slices instead.
- Dairy-free: Choose aged hard cheeses (some find them easier to digest), use nutritional yeast–based “cheese” spreads, and emphasize fruits, nuts, and cured meats (watch for dairy in some salamis).
- Kids’-friendly version: Go mild—mild cheddar, turkey slices, grapes, sliced strawberries, peanut butter (in a mini jar), and honey-roasted peanuts. Skip the blue cheese and spicy peppers!
8. Storage & Reheating
Charcuterie boards are best assembled and served freshly—once moisture from fruits and air exposure starts to wilt crackers, the effect degrades fast.
How long does it last? Assembled and uncovered: up to 2 hours at room temp (per USDA). Covered and refrigerated: cheeses and meats can last up to 5 days—but the crackers and fresh fruit may soften. Store components separately and reassemble close to serving time.
Reheating note: This is a cold/room temp platter—no reheating needed! If accidentally chilled too long before serving, let sit for 15–20 minutes for optimal flavor release.
9. FAQ
How much food do I need for a party?
Plan for about 2 ounces of cheese and 1.5 ounces of meat per person if it’s the main appetizer. For a lighter snack or side, reduce by 25–30%. Add 1–2 crackers per person and small portions of fruit/nuts to round it out.
Can I prep things ahead of time?
Absolutely! Cut cheeses, slice fruits, wash nuts, and prepare dips up to 2 days in advance, storing them separately in airtight glass containers. Assemble the board within 1–2 hours of serving for best texture.
My.board looks too plain—how do I jazz it up?
Use texture and height: stack crackers on little ramekins, roll meats into tight cylinders, or top the cheese wheel with a few toasted walnuts and a drizzle of honey. A sprinkle of edible flowers, rosemary sprigs, or even a dusting of sea salt on melon balls can elevate the presentation.
What’s the easiest beginner-friendly board combo?
Here’s my go-to starter recipe: • 1 wheel of brie • 2 oz aged gouda • 3 oz thin-sliced prosciutto • 1 cup red grapes • ¼ cup honey • 12 water crackers • A handful of toasted almonds Spread honey over the brie, arrange gouda beside it, drape prosciutto in a loose fold, and nestle grapes and almonds in the spaces. Done in 10 minutes—impressive in seconds.
10. Conclusion
Assembling a beginner-friendly charcuterie board isn’t about perfection—it’s about presence. It’s the perfect dish for the home cook who wants to play host without burning the house down. With intentional but simple choices, you can create a beautiful, balanced spread that encourages mingling, nibbling, and—most importantly—enjoying each other’s company. And when your guests ask, “How did you make this look so incredible?,” you can reply with confidence: “I just followed a few smart rules—and made it look easy.”
Once you’ve mastered the basics, why not explore a few more crowd-pleasers from our site? Try the Ultimate Moist Chocolate Banana Bread for dessert, or the Dump-and-Go Smothered Pork Chops if you want to extend the menu with one-pan ease. For game-day energy, the Easy Buffalo Chicken Sliders pair perfectly with your new charcuterie star.
Now go assemble something delicious—and don’t forget to snap a photo before it disappears! 🧀🍇✨
Print
Beginner-Friendly Charcuterie Board for Effortless Party Appetizers
A no-fuss, beginner-friendly charcuterie board featuring cured meats, cheeses, fruits, nuts, and dippers — all assembled in under 15 minutes.
- Total Time: 15 minutes
- Yield: 6–8 servings
Ingredients
- 8 oz curated mixed hard and soft cheeses (e.g., aged cheddar, brie, gouda)
- 6 oz assorted cured meats (e.g., prosciutto, salami, pepperoni)
- 1 cup seedless grapes, halved if large
- ½ cup mixed nuts (e.g., almonds, walnuts)
- ½ cup mixed olives (e.g., black and green)
- ¼ cup cornichons or pickled green beans
- 2 tbsp honey (optional, for drizzling over cheese)
- Fresh rosemary sprigs for garnish
- Crackers or sliced baguette, for serving
Instructions
- Choose a large wooden board, slate, or platter.
- Place cheeses at opposite corners and center — leave space between for slicing.
- Fold or roll meats and arrange around cheeses in small piles or along one side.
- Pile grapes, nuts, and olives in small sections around the board.
- Add small bowls or ramekins for cornichons and honey.
- Garnish with rosemary sprigs and serve with crackers or warm baguette slices.
Notes
- For vegetarian version, swap meats for marinated artichoke hearts and roasted red peppers.
- Ahead of time: prep toppings and chill separately; assemble board 1 hour before serving for best flavor.
- Don’t overfill the board — less is more for a clean, appealing presentation.
- Prep Time: 15 minutes
- Cook Time: 0 minutes
- Method: Assembly only
- Cuisine: French-American
- Diet: High Protein
Nutrition
- Serving Size: 1 plate (approx. 1/6 of board)
- Calories: 280 Kcal
- Sugar: 4g
- Sodium: 420mg
- Fat: 22g
- Saturated Fat: 10g
- Unsaturated Fat: 10g
- Trans Fat: 0g
- Carbohydrates: 8g
- Fiber: 1g
- Protein: 15g
- Cholesterol: 60mg