
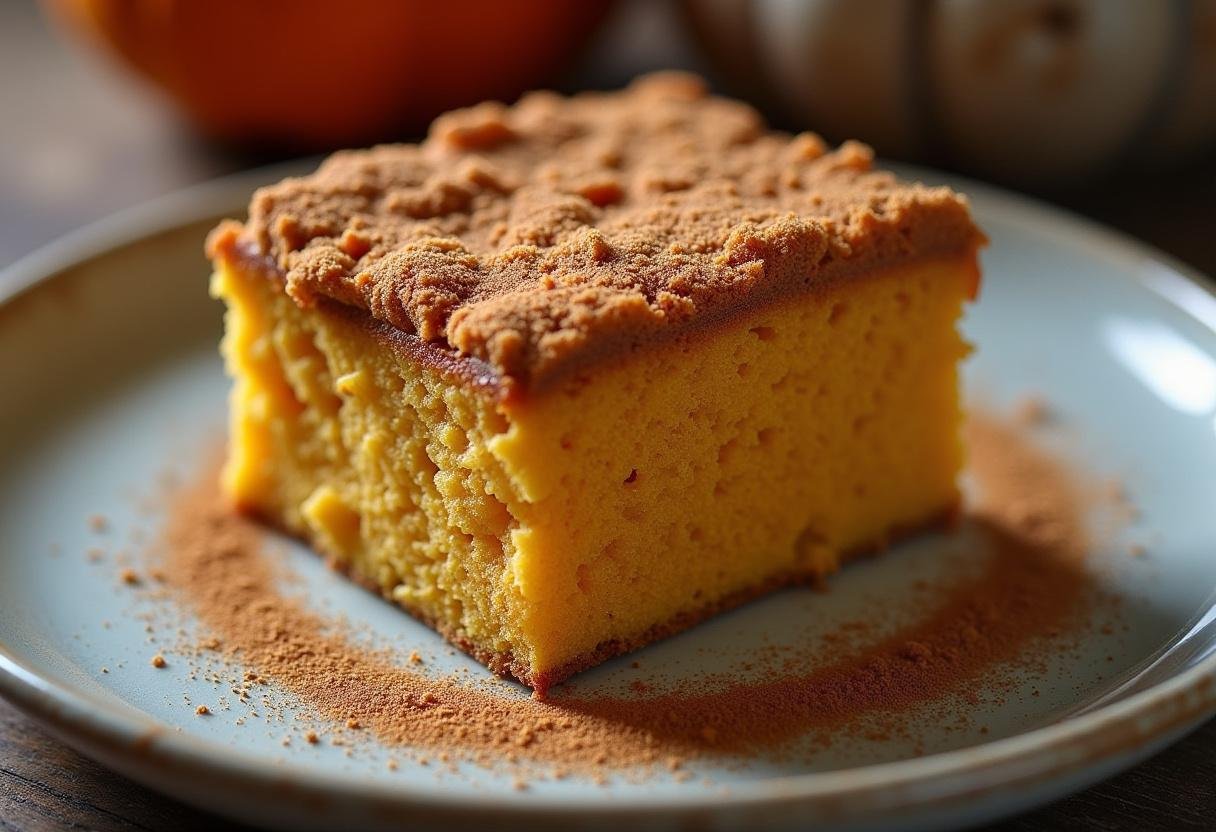
Bolo de Abóbora com Farofa Crocante: Uma Delícia Úmida e Irresistível 🎃🍰✨
1. Introdução: O Encanto Desse Bolo Especial
O bolo de abóbora com farofa crocante é muito mais que uma simples sobremesa – é uma experiência sensorial que combina perfeitamente a maciez do bolo com a textura crocante da cobertura. Essa receita, que vem conquistando cada vez mais adeptos, é ideal para quem busca um doce diferente, nutritivo e incrivelmente saboroso. A abóbora, além de garantir um bolo úmido e fofinho, traz todos os benefícios desse superalimento para sua receita.
Se você gosta de bolos com texturas contrastantes, vai adorar essa combinação. A farofa crocante lembra aquela casquinha deliciosa do bolo de abacaxi com farofa crocante, mas com o sabor único da abóbora. E o melhor: é uma ótima opção para aproveitar aquela abóbora que está na sua cozinha!
Ingredients: Everything You Need
- 2 cups of cooked and mashed pumpkin (tip: kabocha pumpkin is perfect for this recipe)
- 3 eggs (at room temperature for better incorporation)
- 1 cup sugar (can be reduced if you prefer it less sweet)
- 1/2 cup vegetable oil (or melted butter for a richer flavor)
- 2 cups of wheat flour (can be replaced with whole wheat flour)
- 1 tablespoon baking powder (the secret to perfect cake rise)
- 1 teaspoon ground cinnamon (or nutmeg for variety)
- 1 pinch of salt (to balance the flavors)
For the Crunchy Farofa (the special touch!)
- 1/2 cup breadcrumbs (or panko for extra crunch)
- 1/4 cup brown sugar (gives an amazing caramelized flavor)
- 2 tablespoons melted butter (or margarine for vegan version)
- 1 teaspoon ground cinnamon (goes perfectly with pumpkin)
2. Detailed Step by Step
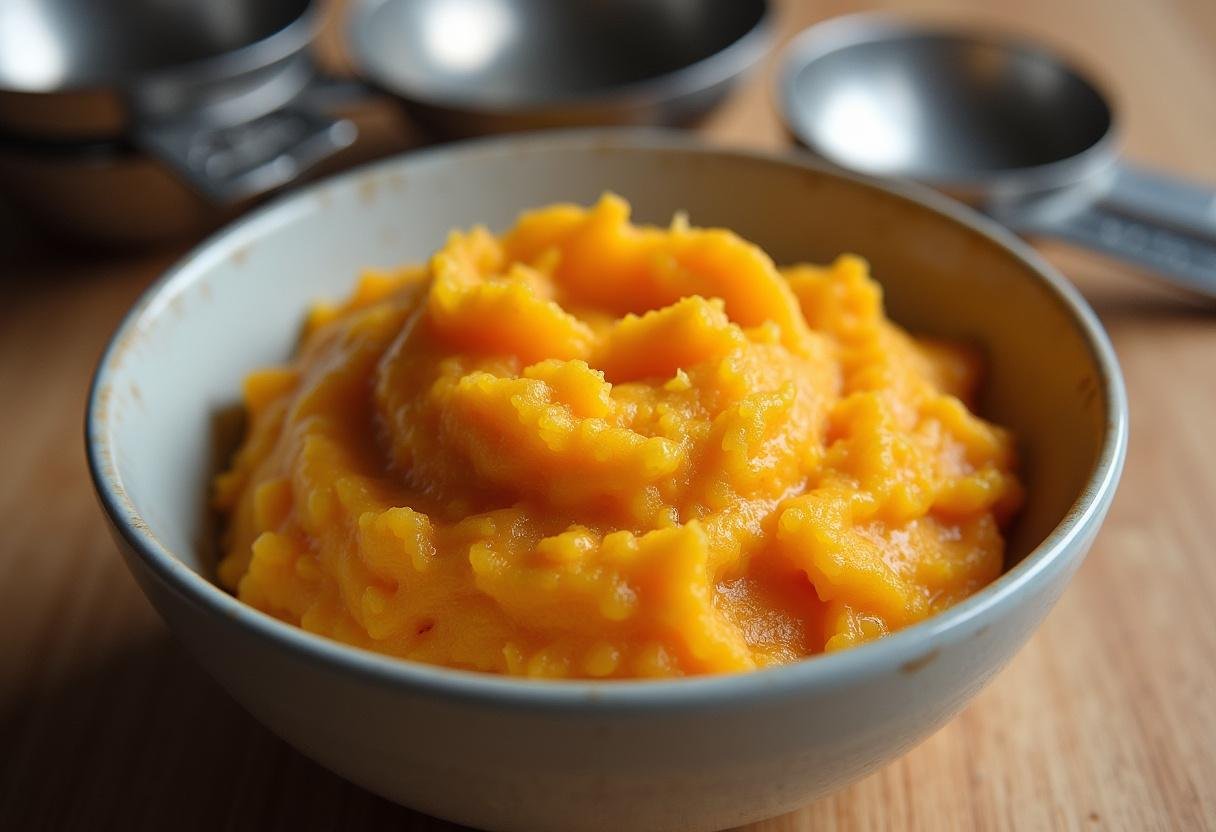
1. Preparing the Pumpkin (the secret to a moist cake)
Start by washing the pumpkin well and cutting it into medium-sized pieces. You can cook it in three ways:
- Steam: Place the pieces in a pan of boiling water and cook for 15-20 minutes until tender.
- In the oven: bake the pieces at 180°C for about 30 minutes
- In the microwave: place in a baking dish with a little water and cook on high power for 8-10 minutes.
Once cooked, remove the skin (which comes off easily) and mash well until you get a smooth puree. If you want an even creamier cake, blend it in a food processor or blender. Set aside.
If you like plant-based cakes, you’ll also love this easy and delicious beetroot cake , which is another great way to include vegetables in your dessert!
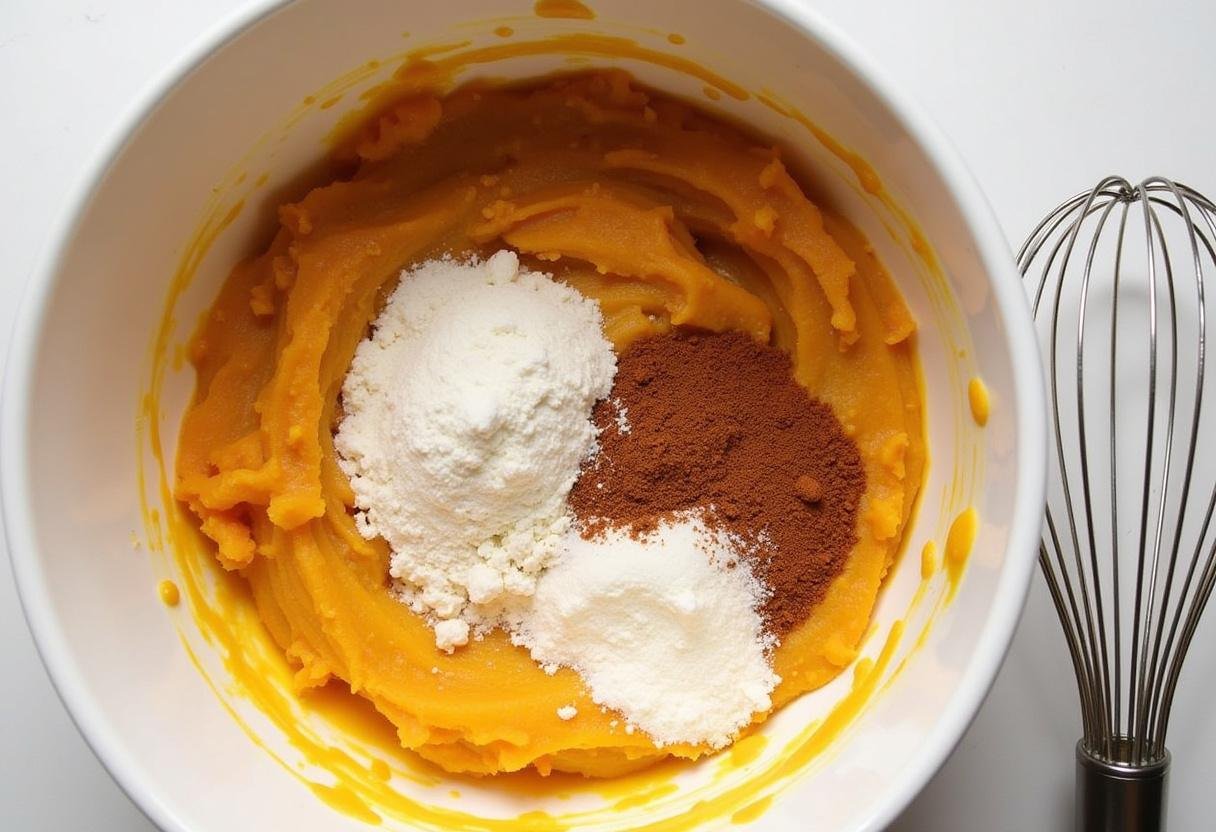
2. Mixing the Ingredients (pay attention to the order!)
In a large bowl, beat the eggs and sugar until light and fluffy (about 3 minutes with an electric mixer). Gradually add the oil, beating constantly. Add the pumpkin puree and mix well. Sift the flour, cinnamon, and salt over the liquid mixture, stirring gently with a whisk or spatula until incorporated (do not overmix or you may develop the gluten). Finally, add the baking powder and mix gently just until incorporated.
This mixing technique is similar to the one used in walnut sponge cake , ensuring a fluffy and airy cake!
3. Preparing the Crunchy Farofa (the recipe’s unique feature)
In a small bowl, mix all the ingredients for the crumble with your hands until it resembles wet sand. The butter should be melted but not hot, so as not to cook the other ingredients. If you want to spice it up, add 1/4 cup chopped walnuts or shredded coconut. Set aside.
This crunchy farofa technique also works wonderfully on passion fruit and coconut bread , creating a delicious contrast!
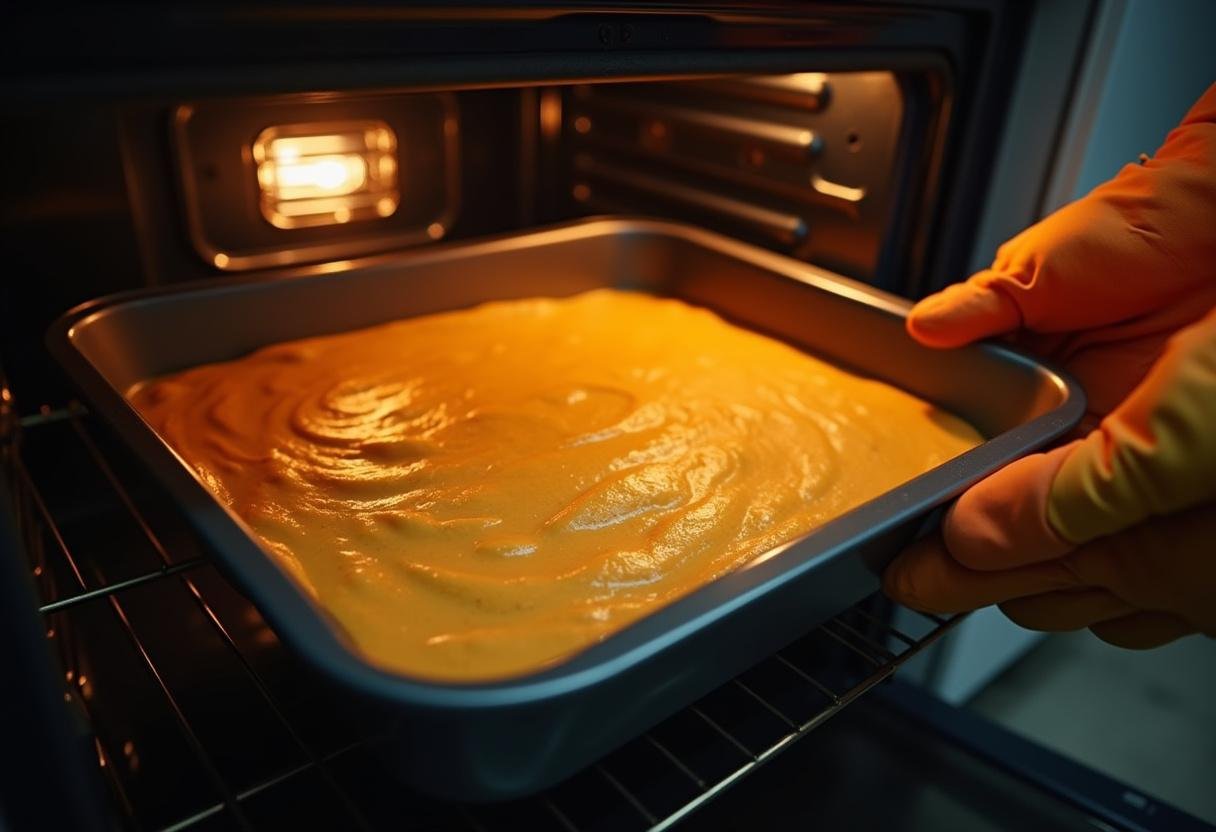
4. Assembling and Baking the Cake (the magic moment)
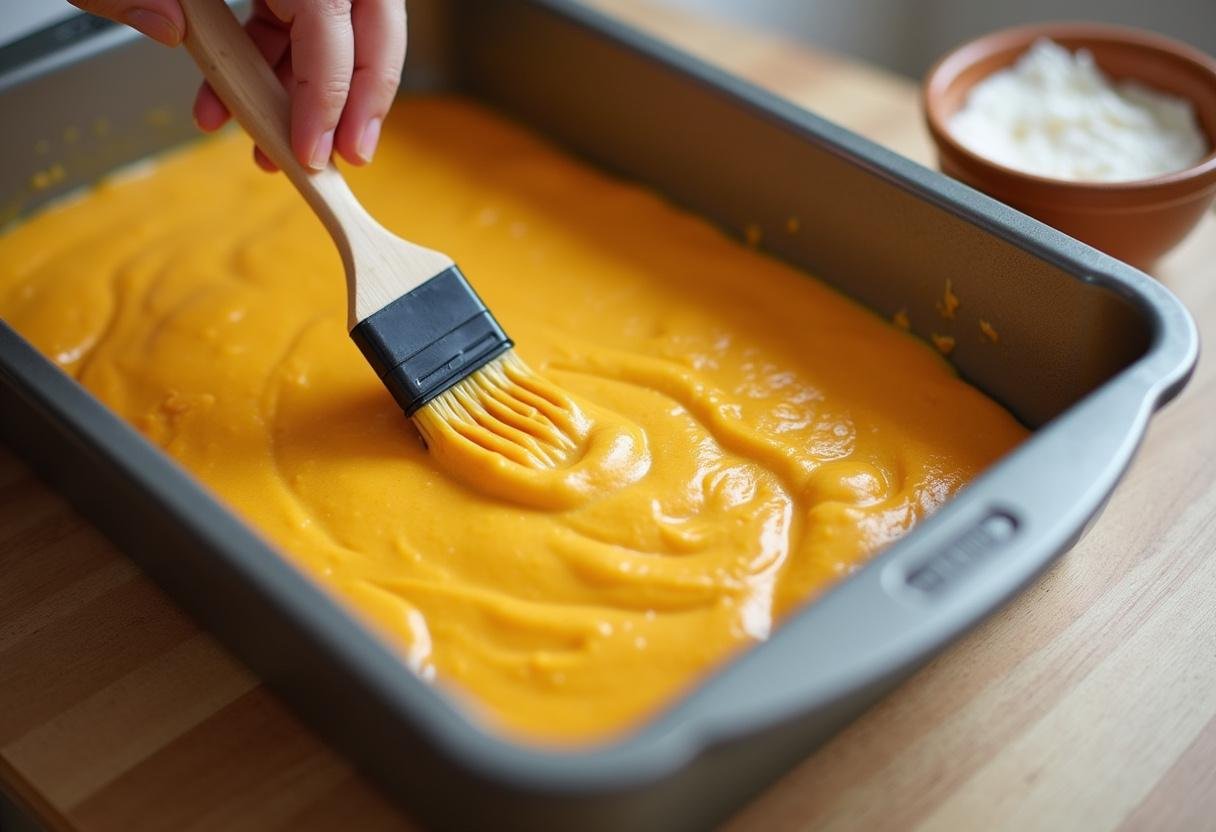
Preheat the oven to 180°C (medium temperature). Generously grease a 22cm diameter pan with butter and sprinkle with wheat flour, tapping out any excess. Pour the batter into the pan and level it with a spatula. Spread the crunchy crumbs evenly on top, pressing lightly to adhere to the batter.
Bake for approximately 40 minutes, but start checking at 30 minutes. The cake is done when a toothpick inserted into the center comes out clean and the edges begin to pull away from the pan. If the crumbs are browning too quickly, cover with aluminum foil for the last 10 minutes.
For more tips on perfect roasting, check out the complete guide on the Me Le Pimenta website , which specializes in pumpkin recipes!
3. Tips and Variations to Customize Your Recipe
- For chocolate lovers: Add 1/2 cup chocolate chips to the batter or replace 1/4 of the flour with cocoa powder.
- Fit version: Replace the sugar with 3/4 cup of coconut sugar or xylitol and use whole wheat flour
- Special touch: Add 1 teaspoon of vanilla essence or 1/2 teaspoon of powdered ginger to the dough
- For lactose intolerant: Use vegetable oil instead of butter and plant-based milk if necessary.
- Incrementando a farofa: Experimente adicionar 2 colheres de aveia em flocos ou granola para mais textura
Se gosta de bolos com frutas cítricas, não deixe de experimentar o bolo de limão e laranja com camomila, que é outra opção refrescante!
4. Benefícios da Abóbora: Nutrição e Sabor
A abóbora é um dos ingredientes mais nutritivos que você pode usar em receitas doces. Rica em betacaroteno (que se transforma em vitamina A no organismo), ela ajuda na saúde da visão, da pele e fortalece o sistema imunológico. Além disso, contém:
- Fibras que melhoram a digestão e promovem saciedade
- Vitamina C com ação antioxidante
- Potássio que ajuda no controle da pressão arterial
- Baixo índice glicêmico, sendo ótima para quem controla o açúcar no sangue
E o melhor: mesmo depois de assada, a abóbora mantém grande parte de seus nutrientes, tornando esse bolo uma opção mais saudável que muitas outras sobremesas.
5. Como Servir: Ideias para Impressionar
Esse bolo é versátil e pode ser servido de diversas formas:
- Café da manhã: Fatias levemente aquecidas com uma camada fina de manteiga
- Sobremesa elegante: Acompanhado de uma bola de sorvete de baunilha e calda de caramelo
- Lanche da tarde: Com uma xícara de chá de canela ou café expresso
- Brunch especial: Em cubos como parte de uma mesa de doces, ao lado de cookies brownie e outras delícias
Para ocasiões especiais, sirva com chantilly caseiro e nozes caramelizadas por cima – fica divino!
6. Armazenamento: Como Conservar por Mais Tempo
Para manter seu bolo fresco e saboroso:
- Em temperatura ambiente: Guarde em recipiente fechado por até 2 dias (coloque um pedaço de papel toalha para absorver umidade)
- Na geladeira: Em vasilha hermética por até 5 dias (deixe em temperatura ambiente antes de servir)
- Congelando: Corte em fatias, envolva individualmente em papel filme e congele por até 3 meses
Dica profissional: Se congelar, descongele na torradeira ou forno para recuperar a crocância da farofa!
7. Perguntas Frequentes Resolvidas
Posso usar abóbora congelada?
Sim! A abóbora congelada funciona perfeitamente, desde que seja descongelada e escorrida para retirar o excesso de água. Se ficar muito líquida, você pode cozinhar em fogo baixo para evaporar parte da água.
Por que meu bolo ficou pesado?
Isso pode acontecer por três motivos principais: 1) excesso de batimento da massa depois de adicionar a farinha, 2) fermento vencido ou em quantidade incorreta, ou 3) forno com temperatura muito baixa. Sempre meça os ingredientes com precisão e siga as etapas corretamente.
Posso fazer em forminha de cupcake?
Absolutely! Reduce the baking time to about 20-25 minutes. This is great for parties or lunch boxes. Also check out the cream cheese pie with blackberry jam for more individual serving ideas!
8. The Story of This Special Cake
Pumpkin cake has deep roots in traditional Brazilian cuisine, where pumpkin has always been an accessible and versatile ingredient. Originally, it was a creative way to use up ripe pumpkin that would otherwise go uneaten. Over time, the recipe has evolved and become more sophisticated, especially with the addition of crunchy farofa, which transforms a simple homemade cake into a restaurant-worthy dessert.
Fun fact: In medieval Europe, pumpkin was already used in sweets, but it was in the American colonies that pumpkin cake as we know it today really developed, along with other wonders such as plums baked with wine that also originated in this period.
9. Conclusion: It’s Worth Trying!
Pumpkin cake with crunchy crumbs is one of those recipes that wins you over with its perfect balance between simplicity and sophistication. Easy to make, but with a result that looks like it came from a professional bakery. In addition to being delicious, it’s a great way to include vegetables in your family’s diet without them even realizing it!
If you like recipes that combine sweet and savory, you will also love the savory cauliflower dumplings or the shrimp pâté to complement your menu.
So, how about getting started today? I guarantee that this cake will become a favorite in your home, perfect for any occasion – from a special breakfast to that family gathering where everyone asks for the recipe!
Print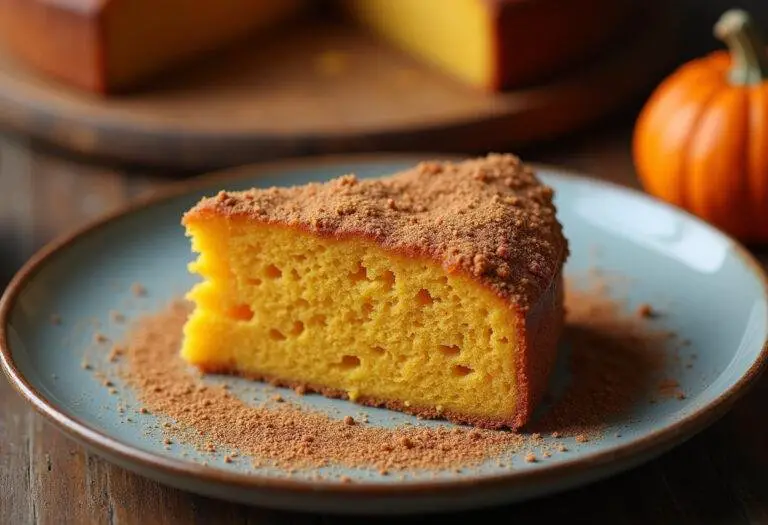
Bolo de abóbora com farofa crocante
O bolo de abóbora com farofa crocante é uma sobremesa perfeita para quem adora combinações de texturas e sabores. A abóbora garante um bolo úmido e saboroso, enquanto a farofa crocante adiciona um toque especial que vai conquistar seu paladar. Essa receita é ideal para o café da manhã, lanche da tarde ou até mesmo como sobremesa em ocasiões especiais. Além disso, é uma ótima maneira de incluir vegetais na alimentação de forma saborosa e criativa.
- Total Time: 1 hora
- Yield: 10 porções
Ingredients
- 2 xícaras de abóbora cozida e amassada
- 3 ovos
- 1 xícara de açúcar
- 1/2 xícara de óleo
- 2 xícaras de farinha de trigo
- 1 colher de sopa de fermento em pó
- 1 colher de chá de canela em pó
- 1 pitada de sal
- Para a Farofa Crocante:
- 1/2 xícara de farinha de rosca
- 1/4 xícara de açúcar mascavo
- 2 colheres de sopa de manteiga derretida
- 1 colher de chá de canela em pó
Instructions
- Cozinhe a abóbora até ficar macia e amasse bem até obter um purê liso. Reserve.
- Em uma tigela grande, bata os ovos com o açúcar até obter uma mistura homogênea. Adicione o óleo e o purê de abóbora, misturando bem.
- Incorpore a farinha de trigo, canela e sal, mexendo delicadamente. Por último, adicione o fermento em pó e misture até incorporar.
- Para a farofa crocante, misture a farinha de rosca, açúcar mascavo, manteiga derretida e canela em pó até formar uma farofa úmida e homogênea.
- Unte uma forma de bolo com manteiga e polvilhe farinha de trigo. Despeje a massa do bolo na forma e espalhe a farofa crocante por cima.
- Leve ao forno preaquecido a 180°C por aproximadamente 40 minutos, ou até que um palito saia limpo quando espetado no centro do bolo.
Notes
- Para um toque extra, adicione nozes ou castanhas picadas à farofa crocante.
- Se preferir um bolo menos doce, reduza a quantidade de açúcar na massa.
- Experimente usar abóbora cabotiá para um sabor ainda mais marcante.
- O bolo pode ser armazenado em temperatura ambiente por até 3 dias, em um recipiente fechado.
- Prep Time: 20 minutos
- Cook Time: 40 minutos
- Category: Sobremesa
- Method: Assado
- Cuisine: Brasileira
- Diet: Vegetariana
Nutrition
- Serving Size: 1 fatia
- Calories: 280 kcal Kcal
- Sugar: 18g
- Sodium: 120mg
- Fat: 12g
- Saturated Fat: 3g
- Unsaturated Fat: 8g
- Trans Fat: 0g
- Carbohydrates: 38g
- Fiber: 2g
- Protein: 4g
- Cholesterol: 55mg
1 thought on “Bolo de abóbora com farofa crocante”