© Original recipe by Golden Whisk Co. ©
🍞🧄 Fluffy Garlic Rolls Recipe for the Perfect Side Dishes 🥖🧄
1. Introduction
If you’re searching for a warm, aromatic, and irresistibly soft garlic roll recipe, you’re in the right place. These garlic rolls are the perfect complement to any meal — whether you’re serving up a hearty roast, a fresh salad, or a steaming bowl of soup. With their golden-brown crust and fluffy, tender interior infused with fragrant garlic, they elevate everyday dinners into special occasions. The best part? They’re surprisingly easy to make from scratch, bringing that bakery-quality smell and flavor directly into your home kitchen.
2. Why You’ll Love This Recipe
- Quick and easy: Ready in under an hour with simple ingredients.
- Delicious aroma: Fill your kitchen with the irresistible scent of garlic and fresh bread.
- Versatile side: Pairs perfectly with pasta, soups, salads, or even on their own.
- Soft and fluffy: Achieve the ideal light texture that melts in your mouth.
3. Ingredient Notes
For the perfect garlic rolls, the quality of your ingredients makes all the difference. Use high-quality bread flour to ensure a strong gluten structure for that wonderful rise and fluffy texture. Fresh garlic cloves provide a robust, aromatic flavor, but you can also use roasted garlic for a sweeter, milder taste. Good butter is essential — opt for unsalted, European-style butter if available, for richness. Fresh herbs like parsley or chives are optional, but they add a lovely color and brightness that balances the garlic’s punch.
4. Kitchen Tools You Need
To make these garlic rolls effortlessly, invest in quality tools. A T-fal 14-Piece Hard Anodized Nonstick Cookware Set helps with dough proofing and baking, ensuring even heat distribution. Use a Compact 6-in-1 Digital Air Fryer to quickly bake or reheat your rolls with a perfectly crispy crust. And don’t forget a good Breville Nespresso Vertuo Creatista Espresso & Coffee Maker to fuel your baking sessions with a quality cup of coffee!
5. How to Make Fluffy Garlic Rolls
Prepare the dough
Start by combining warm milk, yeast, and a pinch of sugar in a bowl. When the mixture becomes bubbly — about five minutes — it’s ready to activate the yeast. Next, add softened butter, salt, and flour. Knead until the dough is soft, elastic, and slightly sticky. Cover with a damp towel and let it rise in a warm corner until doubled in size; this usually takes about 45 minutes. Your kitchen will fill with a yeasty aroma, promising soft, airy rolls ahead.
Shape and fill
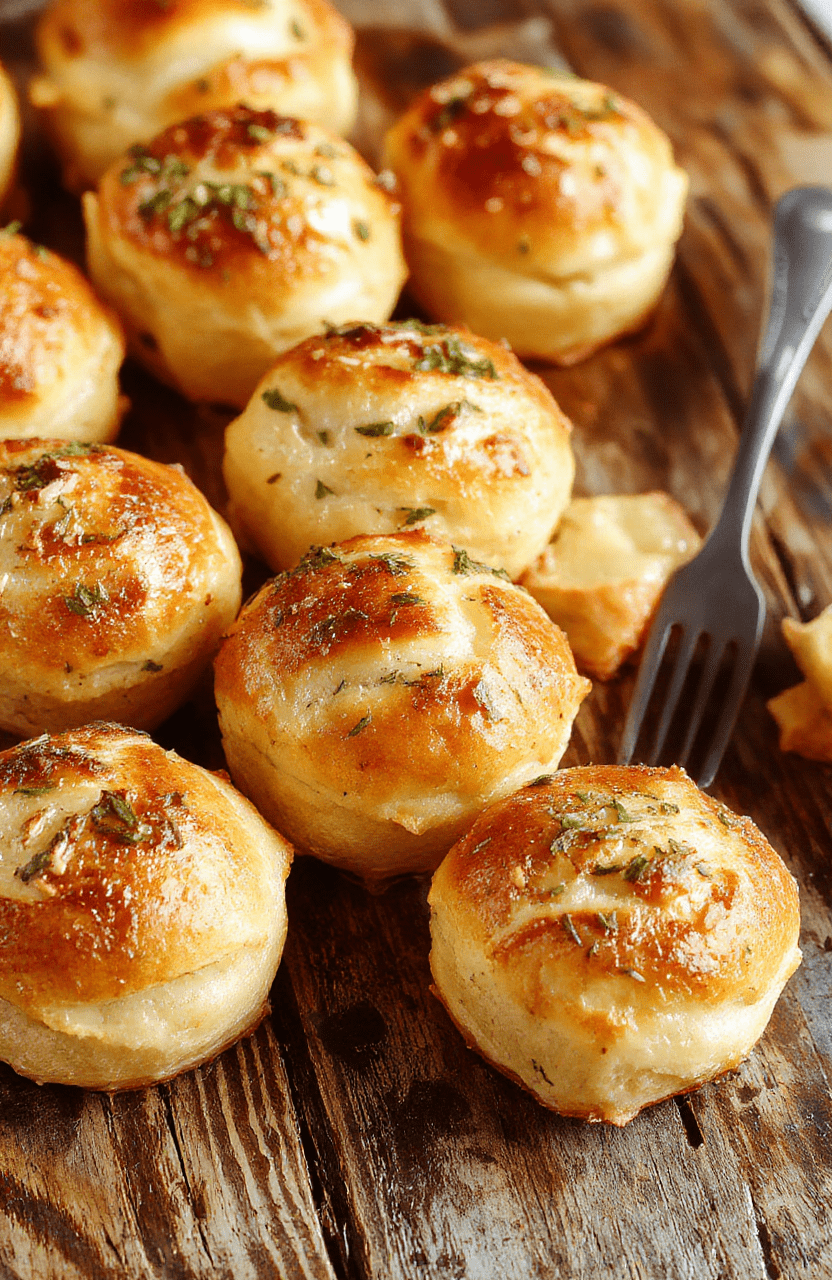
Once risen, punch down the dough and divide it into equal portions. Roll each piece into a ball and flatten slightly. In a small bowl, mix melted butter, minced garlic, and chopped herbs if desired. Brush this fragrant mixture onto each dough piece, then shape into rolls or pinwheels, nestling them into a buttered baking dish. The garlic butter should seep into the layers, infusing every bite with flavor.
Baking to perfection
Bake in a preheated oven at 375°F (190°C) for 15-20 minutes until golden brown. The aroma during baking is simply divine! The rolls should be puffed up, soft, and slightly crispy on top. For an extra crispy crust, you can broil them for an additional minute — just keep a close eye to prevent burning.
6. Expert Tips for Success
- Use fresh yeast for the best rise and fluffiness.
- Don’t overproof — punch down the dough if it over-rises to maintain perfect texture.
- Apply garlic butter generously before and after baking for maximum flavor.
- Try different herbs or cheeses for customized variations.
7. Variations & Substitutions
If you’re gluten-free, try using a high-quality gluten-free flour blend suitable for bread. For vegan versions, substitute butter with plant-based margarine or olive oil, and ensure the yeast is vegan-friendly. You can also experiment with roasted garlic instead of raw for a mellow, caramelized taste. Cheddar or Parmesan cheese can be added to the garlic butter for a cheesy twist that everyone will love.
8. Storage & Reheating
These garlic rolls are best enjoyed warm, but you can store leftovers in an airtight container at room temperature for up to 2 days. For longer storage, place them in the refrigerator — they reheat beautifully in the oven or air fryer. To refresh their soft texture, reheat at 350°F (180°C) for about 5 minutes or until warmed through. For a crispy crust, broil for just a minute or two.
9. FAQ
Can I make these garlic rolls in advance?
Absolutely! You can prepare the dough a day ahead, let it rise, shape the rolls, and store them covered in the refrigerator overnight. Bake just before serving for maximum freshness.
What’s the best type of garlic for flavor?
Fresh garlic cloves provide a vibrant, pungent aroma. Roasted garlic offers a sweeter, mellow flavor if you prefer a subtler garlic taste in your rolls.
Can I freeze leftover garlic rolls?
Yes, after they have cooled completely, store them in a freezer-safe bag for up to 3 months. Reheat in the oven or air fryer for the best texture and flavor.
10. Conclusion
There’s nothing quite like a warm, fluffy garlic roll to accompany any meal. With homemade garlic bread aroma filling your kitchen and a tender, flavorful interior, these dinner rolls are sure to become a family favorite. Whether you’re a seasoned baker or just starting, this recipe is straightforward and absolutely rewarding. Give it a try, and enjoy the complements from everyone at your table!
Print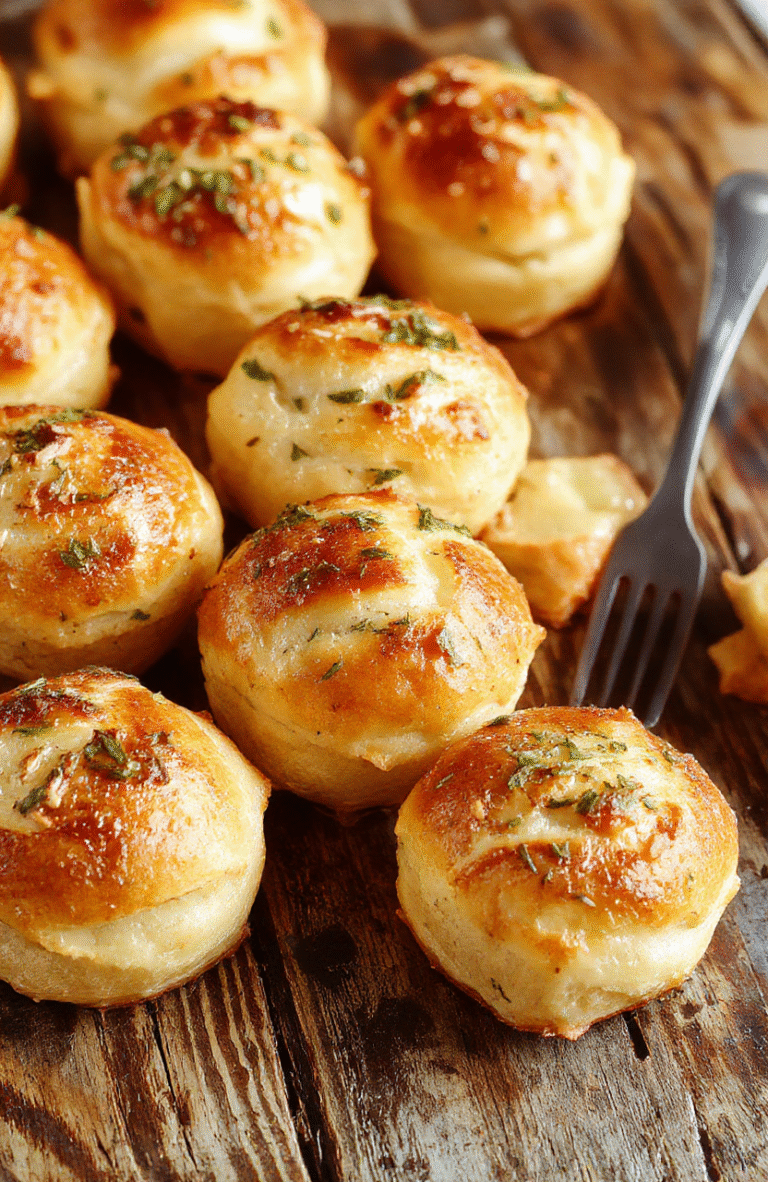
Fluffy Garlic Rolls Recipe for Perfect Side Dishes
Soft, fluffy garlic rolls made from scratch, baked to golden perfection, with a buttery garlic topping and fresh herbs for added flavor.
- Total Time: 1 hour 40 minutes
- Yield: 12 rolls
Ingredients
- 2 cups all-purpose flour
- 1 packet active dry yeast
- 1 cup warm milk
- 1/4 cup unsalted butter, melted
- 1 teaspoon sugar
- 1 teaspoon salt
- 3 cloves garlic, minced
- 2 tablespoons fresh parsley, chopped
- Olive oil for brushing
Instructions
- In a small bowl, activate yeast by mixing warm milk, sugar, and yeast; let sit until frothy (5-10 minutes).
- In a large bowl, combine flour and salt. Add the activated yeast mixture and melted butter; knead until smooth.
- Cover the dough and let rise in a warm place for about 1 hour until doubled in size.
- Preheat oven to 375°F (190°C). Punch down the dough and divide into 12 equal pieces.
- Shape each piece into a ball, place on a baking sheet lined with parchment paper.
- Mix minced garlic with a tablespoon of olive oil and brush over the rolls; top with chopped parsley.
- Bake for 20-25 minutes until golden brown. Brush with additional butter if desired.
Notes
- Ensure milk is warm but not hot to activate the yeast effectively.
- You can add grated cheese or herbs for variation.
- Serve warm for the best experience.
- Prep Time: 15 minutes
- Cook Time: 20-25 minutes
- Method: baking
- Cuisine: American
- Diet: vegetarian
Nutrition
- Serving Size: 1 roll
- Calories: 180 Kcal
- Sugar: 2g
- Sodium: 150mg
- Fat: 8g
- Saturated Fat: 3g
- Unsaturated Fat: 4g
- Trans Fat: 0g
- Carbohydrates: 26g
- Fiber: 1g
- Protein: 4g
- Cholesterol: 15mg