Pierogi Kielbasa Casserole in 30 Minutes: A Cozy, One-Dish Polish-Inspired Comfort Feast 🥟🍖🔥
1. Introduction
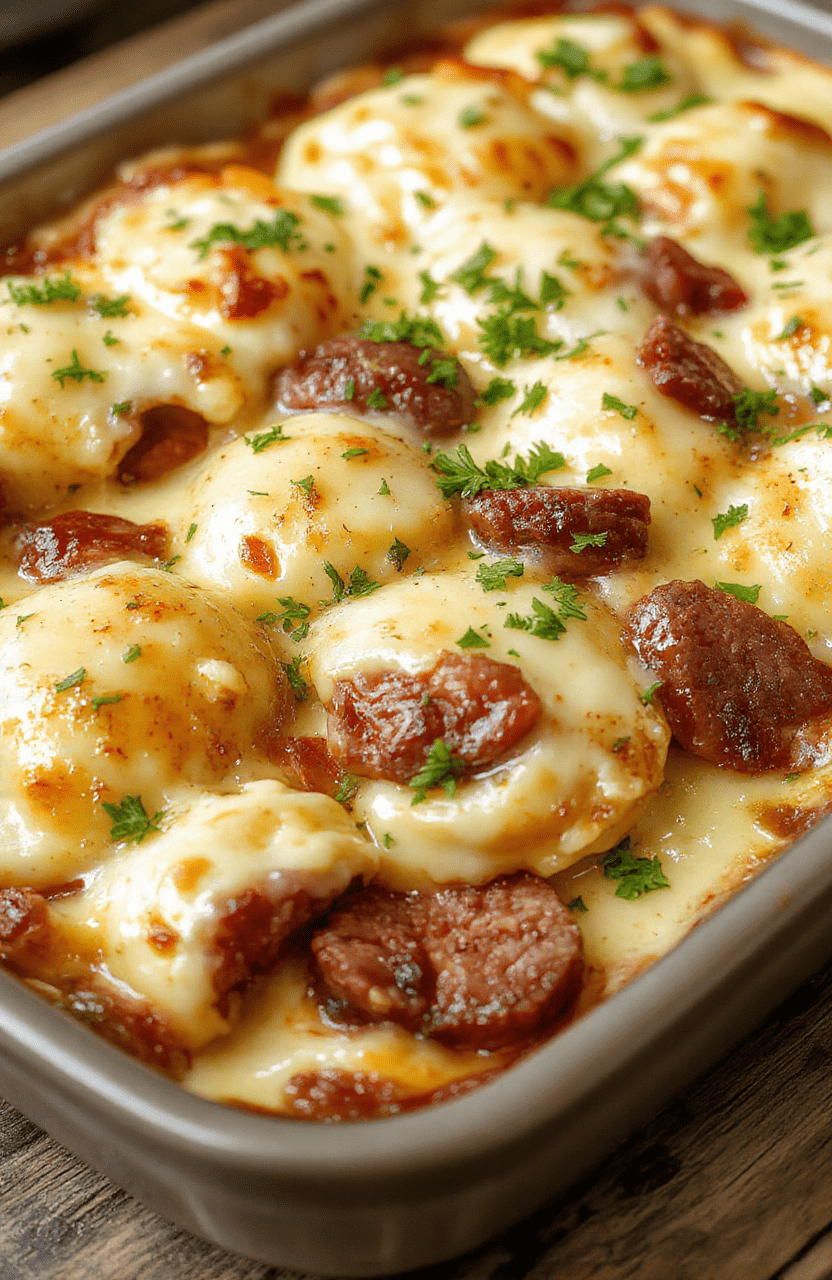
When weeknight hunger strikes and comfort calls your name, this Pierogi casserole recipe delivers big—without stealing your entire evening. Think golden baked frozen pierogi stacked with smoky kielbasa, caramelized onions, melted cheese, and a hint of savory herbs—everything you love about traditional pierogi, but transformed into a rich, golden-brown bake. It’s the kind of dish that brings the whole family to the table, even the picky eaters who usually push veggies to the edge of their plates. Bonus? It’s ready in 30 minutes or less, making it a standout Kielbasa dinner idea and 30 minute easy dinner that doesn’t compromise on flavor or soul-warming satisfaction.
2. Why You’ll Love This Recipe
- Ready in under 30 minutes—perfect for busy weeknights when you’re craving something hearty but time is tight
- One-dish wonder—less cleanup, more cozy vibes
- Frozen pierogi hack—no need to boil and handle delicate dumplings; baking locks in texture and flavor
- Versatile base—swap kielbasa for sausage, spinach, mushrooms, or even shredded chicken
- Freezer-friendly—assemble ahead and bake straight from frozen (just add 10–15 minutes)
3. Ingredient Notes
This casserole relies on just a handful of simple, pantry-friendly ingredients—but the quality *absolutely* makes a difference. Let me walk you through my top picks:
For the **pierogi**, go for frozen potato-and-cheese or sour cream & onion varieties (plain or with chives). If you have time, homemade pierogi are glorious—but during a chaotic week, pre-frozen is the ultimate hero. Look for brands with minimal fillers and real dairy.
Kielbasa should be smoked and firm—not too lean. Polish-style kielbasa (like Hohenheu or Anytown Brand) has that signature garlic-paprika depth. If you can’t find it, smoked sausage or even spicy Italian sausage (pepperoni-style if you love heat) work beautifully.
Onions are non-negotiable. I slice them thin and let them caramelize slowly in a skillet—that deep, sweet-savory note ties the whole dish together.
Dairy options? Use a blend of sharp cheddar and mozzarella for melty, pull-apart richness. A splash of heavy cream or sour cream stirred into the filling adds luxury without extra calories.
Herbs & seasoning: Fresh parsley or dill at the end gives brightness, while a pinch of nutmeg or smoked paprika in the topping adds warmth. Black pepper and salt are your best friends—don’t skip!
4. Kitchen Tools You Need
While this recipe is impressively accessible (just one skillet and one baking dish), a few smart tools can make prep *effortless* and cleanup breeze-like. Here’s what I swear by:
The Compact 6-in-1 Digital Air Fryer by Amazon Basics is perfect for reheating leftover pierogi quickly and crisping them up if you want to add extra crunch before baking.
For even heat distribution and effortless cleanup, a reliable nonstick skillet matters—and the T-fal 14-Piece Hard Anodized Nonstick Cookware Set offers industrial-grade performance without the price tag of luxury brands.
If you love baking everything from casseroles to deep-dish pizzas, the Ninja Foodi Smart XL Indoor Grill & Air Fryer Combo does double-duty: grill chars for smokiness *and* air fry for crisp edges—all in one appliance.
For those who want to go all-in on precision baking, the Breville Nespresso Vertuo Creatista Espresso & Coffee Maker might seem unrelated—but a great espresso shot steams milk beautifully for creamy coffee-based sauces (or just a much-needed pick-me-up). 😉
5. How to Make Pierogi Kielbasa Casserole
Phase 1: Prep & Sear (5 minutes)
Preheat oven to 400°F (200°C). Lightly grease a 9×13-inch baking dish with olive oil or butter.
In a large skillet over medium-high heat, slice 12 oz of kielbasa into ½-inch coins and sear for 2–3 minutes per side until deeply browned. Transfer to a paper-towel-lined plate.
In the same skillet (no need to wash!), add 1 tbsp oil and 1 large finely sliced yellow onion. Sauté 4–5 minutes until golden and slightly crisp-tender. Stir in 1 tsp smoked paprika and a pinch of red pepper flakes for complexity.
Phase 2: Layer & Bake (18 minutes)
In the prepared baking dish, spread half the kielbasa and onions, followed by 1 package (≈32 oz/1 lb) of *frozen* pierogi—no thawing needed! Top with remaining kielbasa/onion mix.
Sprinkle 2 cups shredded sharp cheddar and 1 cup shredded mozzarella evenly over the top. For extra richness, drizzle with 2 tbsp heavy cream or a spoonful of sour cream.
Bake for 15–18 minutes, or until the cheese is bubbling and golden at the edges. For a beautiful crust, finish under the broiler for 1–2 minutes (watch closely!).
Phase 3: Finish & Serve (2 minutes)
Remove from oven, let rest 3 minutes (this helps set the layers), then garnish with chopped fresh parsley and a dollop of sour cream. Serve warm—ideally with a side salad or roasted apples for balance.
6. Expert Tips for Success
Don’t skip these pro touches—they’re what separate *good* from *unforgettable*:
- Don’t overcrowd the skillet—sear kielbasa in batches if needed.Crowding causes steaming, not browning.
- Use frozen pierogi *directly from the freezer*—they’re pre-steamed, so baking is safer and gives better texture than thawed (which can get gummy).
- Layer strategically: Place the heaviest items (pierogi) on top of onions, not under them. Otherwise, the bottom gets soggy.
- Add acid at the end—a squeeze of lemon juice or a spoonful of pickled jalapeño brine cuts the richness and brightens the whole dish.
- Rest before cutting—even 3 minutes lets the cheese set and prevents a soupy mess.
7. Variations & Substitutions
This casserole is a canvas—here’s how to personalize it:
- Vegetarian? Swap kielbasa for smoked tofu or plant-based sausage (Feldman’s or Field Roast work well), and load up with sautéed mushrooms, spinach, and roasted red peppers.
- Extra veggies? Stir in 2 cups shredded cabbage (raw or blanched) or diced zucchini with the onions.
- Gluten-free? Use certified GF frozen pierogi—many brands ( Like frozen pierogi from Trader Joe’s or ownmade with GF flour) now have options.
- Dairy-free? Replace cheese with nutritional yeast + vegan cheddar shreds ( Miyoko’s or Violife), and use coconut cream instead of heavy cream.
- Spice it up! Add 1 minced chipotle in adobo or a dash of cayenne to the onions for a kick.
8. Storage & Reheating
Let the casserole cool completely before storing. It keeps well in an airtight container in the fridge for 3–4 days.
Reheating: – To keep crusty edges, reheat individual portions in the Ninja Air Fryer Pro Crisp & Roast 4-in-1 at 350°F for 4–5 minutes. – For the whole dish, cover with foil and bake at 325°F for 20–25 minutes, then uncovered for the last 5 to crisp the top.
Freezing: Wrap unbaked casserole tightly in foil and freeze up to 3 months. Thaw overnight in fridge, then bake as directed (add 10 minutes).
9. FAQ
Can I make this ahead of time? Absolutely! Assemble the casserole (without baking), cover, and refrigerate overnight. Add 5–7 minutes to baking time if cold from the fridge.
Why are my pierogi sticking to the pan? Make sure your baking dish is well-greased—or line it with parchment for fool-free release. Also, frozen pierogi shouldn’t be thawed before baking.
Can I use refrigerated pierogi? Not ideal. Frozen pierogi have a firmer exterior. Fresh/refrigerated versions are softer and may break apart or release excess starch during baking.
What’s the best side dish? A simple arugula salad with lemon vinaigrette, baked apples, or even steamed broccoli balances the richness beautifully.
10. Conclusion
There’s a reason comfort food endures—it reminds us that care, warmth, and connection can be served in a single dish. This Pierogi casserole recipe is your new go-to for when life gets loud and your taste buds just want to come home. With its golden crust, melty center, and savory kielbasa bite, it’s proof that tradition and convenience can coexist—and thrive.
Print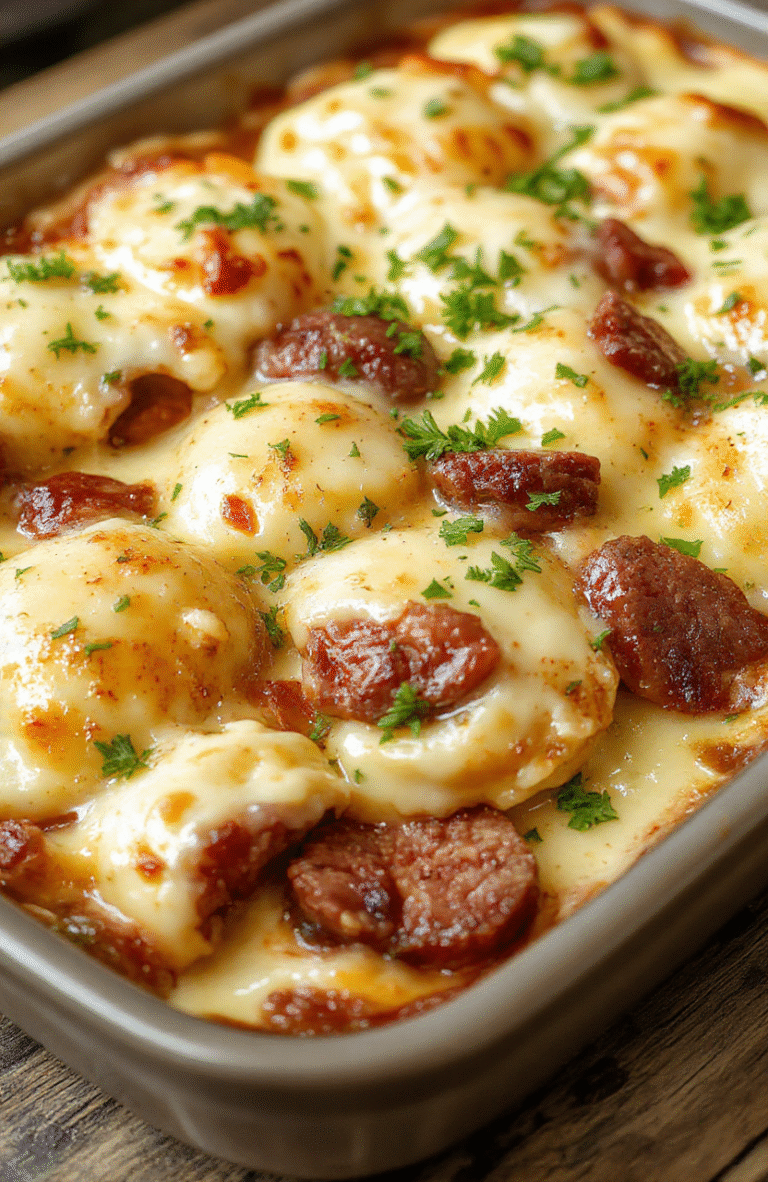
Pierogi Kielbasa Casserole in 30 Minutes
This cozy, cheesy pierogi kielbasa casserole comes together in about 30 minutes. Layers of potato pierogi kiss with smoky kielbasa, onions, garlic, and a creamy cheese sauce, then bake until bubbling and golden. A simple, crowd-pleasing weeknight staple.
- Total Time: 30 mins
- Yield: 6 servings
Ingredients
- 2 (12–16 oz) packages frozen potato and cheese pierogi
- 12 oz kielbasa, sliced into 1/4-inch rounds
- 1 medium onion, sliced
- 2 cloves garlic, minced
- 1 cup shredded cheddar or mozzarella cheese
- 1/2 cup sour cream
- 1/2 cup milk
- 2 tbsp butter, divided
- 1/2 tsp paprika
- Salt and pepper to taste
Instructions
- Preheat oven to 375°F (190°C).
- In a skillet, melt 1 tablespoon butter and sauté onion until translucent, about 3–4 minutes. Add garlic and kielbasa; cook until lightly browned, 4–6 minutes.
- In a large bowl, whisk together sour cream and milk; season with salt and pepper. In a casserole dish, layer pierogi, followed by the kielbasa mixture.
- Pour the sour cream mixture over the pierogi and kielbasa, then sprinkle with cheese and paprika. Dot with remaining butter.
- Bake 20–25 minutes until bubbly and cheese is melted and golden. Let rest 5 minutes before serving.
Notes
- Substitute chicken sausage or turkey kielbasa for lighter options.
- Make ahead: assemble and refrigerate up to 1 day before baking; bake 5–10 minutes longer.
- For gluten-free, use gluten-free pierogi.
- Top with chopped parsley for color before serving.
- Prep Time: 15 mins
- Cook Time: 15 mins
- Method: Baking
- Cuisine: American, Eastern European-inspired
- Diet: Non-Vegetarian
Nutrition
- Serving Size: 1 serving
- Calories: 520 Kcal
- Sugar: 6 g
- Sodium: 940 mg
- Fat: 28 g
- Saturated Fat: 10 g
- Unsaturated Fat: 12 g
- Trans Fat: 0 g
- Carbohydrates: 48 g
- Fiber: 4 g
- Protein: 26 g
- Cholesterol: 115 mg