🍪 bakery magic in your kitchen: Thick Levain Style Chocolate Chip Cookies that taste like they came from a legendary bakery 🍪
1. Introduction
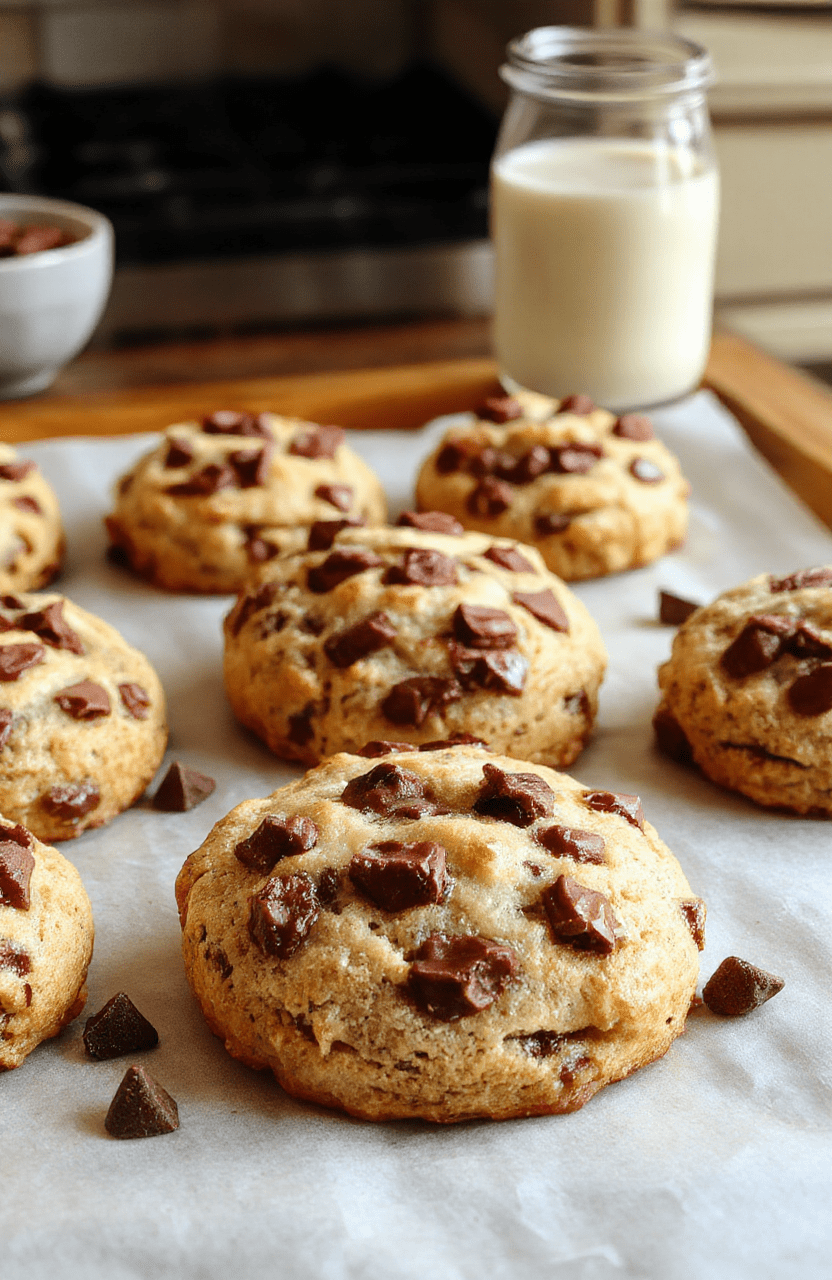
Let’s be real: there’s something almost *sacred* about stepping into a bakery and being hit by that warm, buttery, caramelized-vanilla-and-dark-chocolate scent wafting from the cooling racks. Among the classics—flaky croissants, crusty sourdough, chewy babka—the Levain style chocolate chip cookies stand out like a rockstar on stage. Thick, towering, with a crisp shell giving way to a/molten-center-like chew, they’re a masterpiece in cookie form.
In thisrecipe, we’re cracking the code to recreate that bakery-level magic right on your kitchen counter. Using a high-hydration dough, a long cold fermentation (even without true levain starter—more on that soon!), and just the right balance of browned butter and sea salt, you’ll get cookies that crack, crackle, and hold their shape like a true pro. If you’ve ever wished you could buy a cookie that tastes like it’s straight from Levain Bakery in NYC—or better yet, better—this is your moment.
Ready to bake cookies that turn heads and spark gasps? Let’s get into why this method works—and how you can nail it on the first try.
2. Why You’ll Love This Recipe
- True bakery texture, zero bakery markup — Thick, chewy edges, gooey center, and that signature “ears to pull” texture — no冷冻 dough required.
- No fancy equipment needed — Just a bowl, a spatula, and your oven. (Though if you *do* want to level up your baking game, the KitchenAid Artisan Stand Mixer makes mixing those stiff doughs a dream.)
- Frozen dough option for fresh-baked on demand — Portion & freeze, then bake straight from frozen when a craving hits.
- No waiting for leavening “magic” — We skip the 72+ hour real levain starter and mimic the flavor depth with cold fermentation and high-brown butter.
- Bonus cozy kitchen vibes — While these bake, your home will smell like the version of comfort you didn’t know you needed.
3. Ingredient Notes
When it comes to Levain-style cookies, *every* ingredient plays a lead role—trimming corners won’t deliver the same result.
- High-quality unsalted butter — We’re browning *half* the butter to add nutty, toasty depth. Use European-style butter if you can (higher fat = richer texture), like Plugrá or Plugrá Extra Premium.
- Dark brown sugar (not light) — More molasses = more moisture retention and chew. This is non-negotiable.
- Plainall-purpose flour + bread flour blend — Too much AP flour = cakey, too much bread flour = tough. We use a 50/50 combo to boost structure *and* tenderness without gumminess.
- Large eggs, room temp — Cold eggs can seize the butter and cause greasiness. Let them sit 45 minutes before baking.
- High-fat chocolate (64–70% cacao) — We call for a combo: Ghirardelli 60% for balance, and Guanaja 70% for depth. Chop chunks yourself (not chips!) for that uneven, messy, bakery-like melt. (Pre-chopped baker’s chocolate can dry your cookie out.)
- Flaky sea salt (Maldon recommended) — Sprinkled *after* baking—it enhances sweetness and creates that sweet/salty crackle.
The “levain” magic here comes not from wild yeast, but from slow fermentation: an overnight chill (16–24 hours) allows enzymes to break down starches, developing complex flavor and improving texture—just like a true levain would.
4. Kitchen Tools You Need
While you *can* make these with just a bowl and wooden spoon, a few well-chosen tools make all the difference between “pretty good” and “I can’t believe I made this.”:
- KitchenAid Artisan 5-Quart Stand Mixer — Makes creaming butter and sugar *effortless*, and the dough hook prevents overmixing. (My trusty orange one has seen over 5,000 batches—and counting!)
- JoyJolt Airtight Glass Food Storage Set — Perfect for storing your dough overnight (no plastic taste!) and keeping baked cookies fresh for up to 5 days.
- Clever Fox DIY Family Recipe Journal — Jot down your notes: “chilled 20 hrs instead of 24 = extra chewy,” or “taste-tested with kids = gone too fast.” Your future self will thank you.
- Grande rimmed baking sheet + Deluxe 33-Piece Silicone Utensil Set — A stainless steel rim prevents warping, and a silicone scraper ensures zero dough waste.
- TOSHIBA Compact & Smart Microwave (0.9 Cu Ft) — For *quick* browned butter (4 mins, no monitoring needed—see Tip #11.3).
As always, if you’re building a full kitchen upgrade, the Ninja Foodi Smart XL Indoor Grill & Air Fryer Combo is fantastic for roasting nuts for cookie add-ins or even finishing cookies with a *touch* of broil to caramelize the surface.
5. How to Make Thick Levain Style Chocolate Chip Cookies
This isn’t your “throw everything in a bowl” recipe. It’s a *process*—but one that rewards patience.
Phase 1: Brown the Butter & Chill the Dough (Day 1)
Start on Day 1. Melt 140g (1 stick) of unsalted butter in a saucepan over medium heat. Swirl constantly until it turns nutty and golden—about 3–4 minutes. Transfer immediately to a heatproof bowl and let cool 5 minutes, then stir in remaining 113g (1 stick) softened butter. Let sit until 75°F (24°C), about 15 minutes.
In a separate bowl, whisk together flour, brown sugar, granulated sugar, cornstarch (yes, cornstarch for tenderness!), and salt. In another bowl, whisk the egg, egg yolk, and vanilla. Fold wet into dry, then incorporate the butter. Mix just until combined—no overmixing.
Stir in chocolate chunks (200g total). Cover with plastic *directly on the surface* to prevent drying. Chill for 16–24 hours.
What to expect: After 16 hours, the dough will look darker, smell deeply buttery, and hold its shape when scooped—like modeling clay.
Phase 2: Scoop, Freeze, and Bake (Day 2)
Remove dough from fridge 15 minutes before baking. Preheat oven to 375°F (190°C) with convection *off*. Use a 3-oz (~⅓ cup) cookie scoop—consistency is key for that bakerly height. Roll into tight balls, then place 4 inches apart on parchment-lined sheets.
Critical step: Freeze scooped balls for 10 minutes. This prevents spreading and preserves the tall dome.
Bake 14–16 minutes. At the 10-minute mark, gently rotate pan. Cookies are done when edges are set but centers still look *very* soft and underbaked—the residual heat will finish them.
Immediately sprinkle with flaky sea salt. Cool on sheet 5 minutes, then transfer to rack.
6. Expert Tips for Success
- Don’t skip the cornstarch — Just 1 tbsp mimics the tender crumb of high-end bakery cookies by reducing gluten formation.
- Freeze the scoops — This step is why your cookies stay tall. Skip it, and you get flat pancakes. Just 10 minutes works wonders.
- Bake from frozen? Yes! — If you froze the dough balls, add 2–4 minutes. They’ll puff beautifully in the oven.
- Use parchment—not silicone mats — Silicone can insulate heat and cause over-browning on the bottom.
- Underbake intentionally — Cookies continue to cook for 5+ minutes on the hot sheet. Pulling at the *right* time (soft centers) = perfect chew.
- Chill the dough in a sealed container — We want controlled evaporation, not a leather-ish crust on top.
- Taste your chocolate — Darker chocolate = less sweet. If using 85% cacao, add 1 extra tbsp sugar to balance.
7. Variations & Substitutions
- Gluten-free — Swap 1:1 with King Arthur Bread Flour (GF version). Add ¼ tsp xanthan gum if your blend doesn’t include it.
- Dairy-free — Use Miyoko’s Vegan Butter and oat milk chocolate (like Hu). Texture will be slightly softer—but still delish.
- Salted caramel twist — Fold in ½ cup chopped salted caramel candies + sprinkle ½ tsp flaky salt over each cookie before freezing.
- Nutty upgrade — Add ½ cup toasted, chopped walnuts or macadamias with the chocolate.
- Espresso kick — Mix 1 tsp instant espresso powder into the dry ingredients. It deepens chocolate flavor *without* tasting like coffee.
8. Storage & Reheating
Room temp: Store in an airtight container (like the JoyJolt Glass Set) for up to 5 days. Place a slice of bread inside—its moisture keeps cookies soft.
Frozen: Baked or scooped dough freeze beautifully for 3 months. To bake frozen balls: no thaw needed. Just add 3–4 minutes.
Reviving leftovers: Pop a cookie in a 300°F (150°C) oven for 4–5 minutes, or microwave with a glass of water for 15 seconds. That melty center? Reborn.
9. FAQ
Do I need a real levain starter for these cookies?
Nope! The name “levain style” refers to the *method*—long, cold fermentation for depth and chew—not a literal starter. Using 24-hour chill gives us the same flavor profile without sourdough maintenance.
How do I prevent my cookies from spreading too much?
Three keys: 1) freeze scooped dough, 2) ensure your butter is *not* melted (it must be soft but cool), and 3) use bread flour ratio + cornstarch for structure.
Can I double the batch?
Absolutely—but chill dough in separate batches. Large dough quantities can warm up during mixing, which kills the chill factor.
Why use both brown and granulated sugar?
Granulated sugar adds crispness and spread; brown sugar delivers moisture and chew. The combo = ideal texture balance.
10. Conclusion
These Thick Levain Style Chocolate Chip Cookies aren’t just cookies—they’re an *experience*. With their sturdy edges, fudgy center, and that signature sweet-salty finish, they’re proof that bakery-grade joy doesn’t require a bakery. Just patience, quality ingredients, and a little kitchen science.
Once you bite into that first warm cookie? You’ll understand why people queue before dawn in Manhattan for a single one. And when your friends beg for the recipe? That’s when you smile, tell them to check out your easy Crockpot BBQ chicken next—and come back for the cookies.
Bake big. Share generously. Eat fast. 🍪
Print
Thick Levain Style Chocolate Chip Cookies From Bakery Results At Home
A thick Levain-style chocolate chip cookie with a crackly exterior and a soft, chewy center, loaded with semisweet chips and optional nuts.
- Total Time: 1 hour 30 mins
- Yield: 24 cookies
Ingredients
- 1 cup (227 g) unsalted butter, softened
- 1 cup granulated sugar
- 1 cup packed light brown sugar
- 2 large eggs
- 2 tsp vanilla extract
- 2 1/4 cups (281 g) all-purpose flour
- 1 tsp baking soda
- 1/2 tsp salt
- 2 cups semisweet chocolate chips
- 1 cup chopped nuts (optional)
Instructions
- Preheat oven to 350°F (175°C). Line baking sheets with parchment.
- Beat butter and sugars until light and fluffy, 2-3 minutes.
- Add eggs one at a time, then vanilla; mix until combined.
- Whisk flour, baking soda, and salt in a separate bowl; add to wet ingredients just until combined.
- Fold in chocolate chips and nuts if using.
- Chill dough 30-60 minutes for thickness and flavor development.
- Scoop dough onto sheets about 2 inches apart.
- Bake 12-14 minutes until edges are golden and centers are set but soft. Let cool 5 minutes on sheet, then transfer to a rack.
Notes
- Chilling dough overnight yields even thicker cookies.
- For evenly round cookies, chill dough balls before baking and flatten slightly before baking.
- Store baked cookies in an airtight container for up to 3 days or freeze dough for up to 1 month.
- Prep Time: 20 mins
- Cook Time: 12-14 mins per batch
- Method: Bake
- Cuisine: American
- Diet: Vegetarian
Nutrition
- Serving Size: 1 cookie (40 g)
- Calories: 250 Kcal
- Sugar: 14 g
- Sodium: 140 mg
- Fat: 12 g
- Saturated Fat: 6 g
- Unsaturated Fat: 5 g
- Trans Fat: 0 g
- Carbohydrates: 34 g
- Fiber: 1 g
- Protein: 4 g
- Cholesterol: 40 mg